通过脚本自动化打包IOS项目
如果想要单个包批量打包请查看IOS脚本批量打包
一、Shell脚本
Shell 是一个用 C 语言编写的程序,它是用户使用 Linux 的桥梁。Shell 既是一种命令语言,又是一种程序设计语言。shell脚本基础学习
在终端输入man xcodebuild,可以看到Description里面有介绍用法。
xcodebuild指令文档学习
项目目录结构
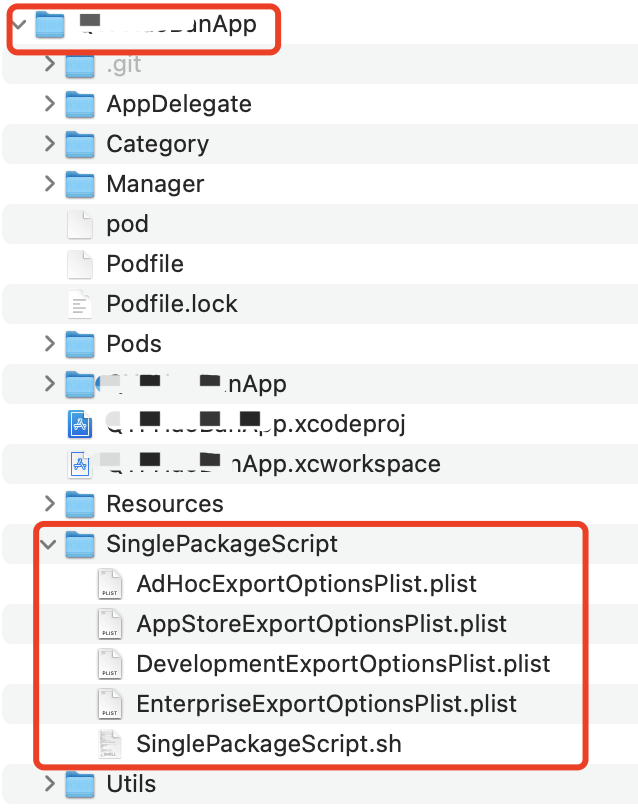
结构说明:
SinglePackageScript.sh : 为脚本文件 (可不修改)
各个Plist:为打包4种打包模式 AdHoc、AppStore、Development、Enterprise (不需要动)
1
2
3
4
5
6
7
8
9
10
11
12
| <?xml version="1.0" encoding="UTF-8"?>
<!DOCTYPE plist PUBLIC "-//Apple//DTD PLIST 1.0//EN" "http://www.apple.com/DTDs/PropertyList-1.0.dtd">
<plist version="1.0">
<dict>
<key>method</key>
<string>development</string>//这儿development、enterprise、ad-hoc、app-store四种
<key>signingStyle</key>
<string>automatic</string>
<key>compileBitcode</key>
<false/>
</dict>
</plist>
|
二、开始打包操作
1
2
| cd /Users/mac/Desktop/您的项目名称/SinglePackageScript
sh SinglePackageScript.sh
|
上面要cd到当前项目文件夹下的SinglePackageScript脚本目录,原因是为了当其他项目在不同的目录路径下时,获取到项目层级会不一致,不同的电脑上可能不是同一个,所以cd项目时需要先项目目录文件下SinglePackageScript目录下。
所有脚本如下:
1
2
3
4
5
6
7
8
9
10
11
12
13
14
15
16
17
18
19
20
21
22
23
24
25
26
27
28
29
30
31
32
33
34
35
36
37
38
39
40
41
42
43
44
45
46
47
48
49
50
51
52
53
54
55
56
57
58
59
60
61
62
63
64
65
66
67
68
69
70
71
72
73
74
75
76
77
78
79
80
81
82
83
84
85
86
87
88
89
90
91
92
93
94
95
96
97
98
99
100
101
102
103
104
105
106
107
108
109
110
111
112
113
114
115
116
117
118
119
120
121
122
123
124
125
126
127
128
129
130
131
132
133
134
135
136
137
138
139
140
141
142
143
144
145
146
147
148
149
150
| #!/bin/bash
is_workspace="true"
build_configuration="Release"
cd ..
projectName=`find . -name *.xcodeproj | awk -F "[/.]" '{print $(NF-1)}'`
schemeName=${projectName}
ipaPath=~/Desktop/${schemeName}
buildDir="${ipaPath}/${schemeName}.xcarchive"
plistPath="./SinglePackageScript"
exportOptionsPlistPath="${plistPath}/AdHocExportOptionsPlist.plist"
beginTime=`date +%s`
isUploadPgyer=0
USERKEY="xxx"
APIKEY="xxx"
isUploadFir=1
FirApiToken="931b41960fd41496b946e2442c910adb97"
echo "\033[36;1m请选择打包方式(输入序号,按回车即可) \033[0m"
echo "\033[33;1m1. AdHoc \033[0m"
echo "\033[33;1m2. AppStore \033[0m"
echo "\033[33;1m3. Enterprise \033[0m"
echo "\033[33;1m4. Development \033[0m"
read parameter
sleep 0.5
method="$parameter"
if [ -n "$method" ]
then
if [ "$method" = "1" ] ; then
exportOptionsPlistPath="${plistPath}/AdHocExportOptionsPlist.plist"
elif [ "$method" = "2" ] ; then
exportOptionsPlistPath="${plistPath}/AppStoreExportOptionsPlist.plist"
elif [ "$method" = "3" ] ; then
exportOptionsPlistPath="${plistPath}/EnterpriseExportOptionsPlist.plist"
elif [ "$method" = "4" ] ; then
exportOptionsPlistPath="${plistPath}/DevelopmentExportOptionsPlist.plist"
else
echo "输入的参数无效!!!"
exit 1
fi
fi
echo "\033[32m************************* 开始构建项目 ************************* \033[0m"
rm -rf mkdir ${ipaPath}
mkdir ${ipaPath}
if [ -d "$ipaPath" ] ; then
echo $ipaPath
else
mkdir -pv $ipaPath
fi
if $is_workspace ; then
xcodebuild clean -workspace ${projectName}.xcworkspace \
-scheme ${schemeName} \
-configuration ${build_configuration}
xcodebuild archive -workspace ${projectName}.xcworkspace \
-scheme ${schemeName} \
-configuration ${build_configuration} \
-archivePath ${buildDir}
else
xcodebuild clean -project ${projectName}.xcodeproj \
-scheme ${schemeName} \
-configuration ${build_configuration}
xcodebuild archive -project ${projectName}.xcodeproj \
-scheme ${schemeName} \
-configuration ${build_configuration} \
-archivePath ${buildDir}
fi
if [ -d "$buildDir" ] ; then
echo "\033[32;1m项目构建成功 \033[0m"
else
echo "\033[31;1m项目构建失败 \033[0m"
exit 1
fi
echo "33[31m appName:$projectName n 33[0m"
xcodebuild -exportArchive -archivePath ${buildDir} -exportOptionsPlist ${exportOptionsPlistPath} -exportPath ${ipaPath} -allowProvisioningUpdates ${YES} -allowProvisioningDeviceRegistration ${YES}
if [[ $? = 0 ]]; then
echo "33[31m n 生成 IPA 成功 nnnnn33[0m"
else
echo "33[31m n 生成 IPA 失败 nnnnn33[0m"
fi
rm -rf ${buildDir}
if [[ $isUploadFir = 1 ]]; then
echo "正在上传fir..."
fir p "${ipaPath}/${displayName}/${displayName}.ipa" -T ${FirApiToken}
fi
if [[ $ISUPLOAD = 1 ]]; then
echo "正在上传蒲公英..."
curl -F "file=@$ipaPath/${displayName}/${displayName}.ipa" -F "uKey=$USERKEY" -F "_api_key=$APIKEY" http://www.pgyer.com/apiv1/app/upload
fi
endTime=`date +%s`
echo -e "打包时间$[ endTime - beginTime ]秒"
|
判读用户是否有输入 1、AdHoc 2、AppStore 3、Enterprise 4、Development 等待生成ipa
如果打包出现证书匹配问题,如果选择的auto 脚本里需要配置,上面脚本已经配置。
-allowProvisioningUpdates ${YES}
-allowProvisioningDeviceRegistration ${YES}
如果打包报其他错误,请先在Xcode项目上保证能archive,先解决掉代码上的错误才能保证脚本打包。
三、生成产品包
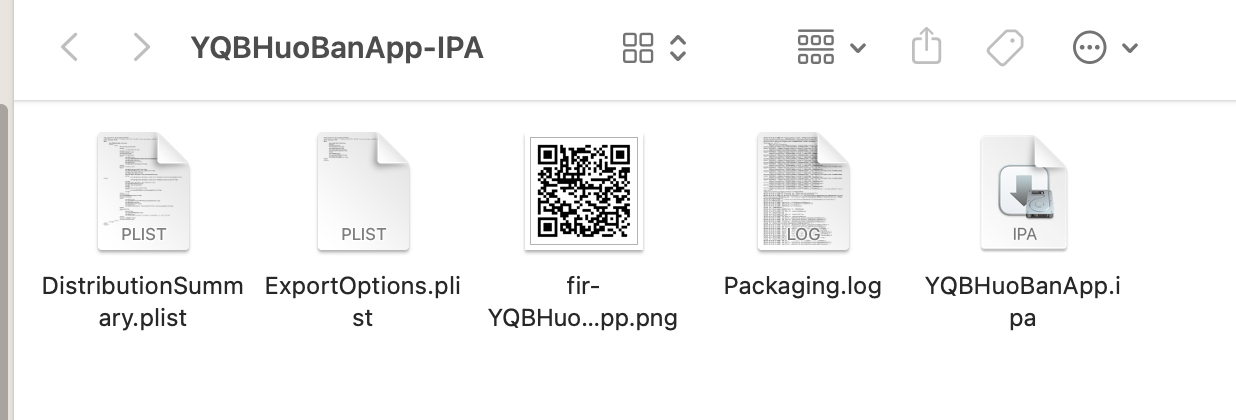
如果上传fri,对应的二维码就是生成在fir平台的安装包
如果没有安装fir插件,请先安装
1
| sudo gem install fir-cli –no-ri –no-rdoc
|
执行成功会生成对应的项目文件目录
1
2
| echo "fir平台..."
fir p ${ipaPath}/${displayName}/${displayName}.ipa -T 931b41960f7496b946ei2c910pdb97
|
上面-T后面的token需要替换成你自己,上面只是例子随便的值,如果想要知道如果获取fir的token登陆fir官网看以下图
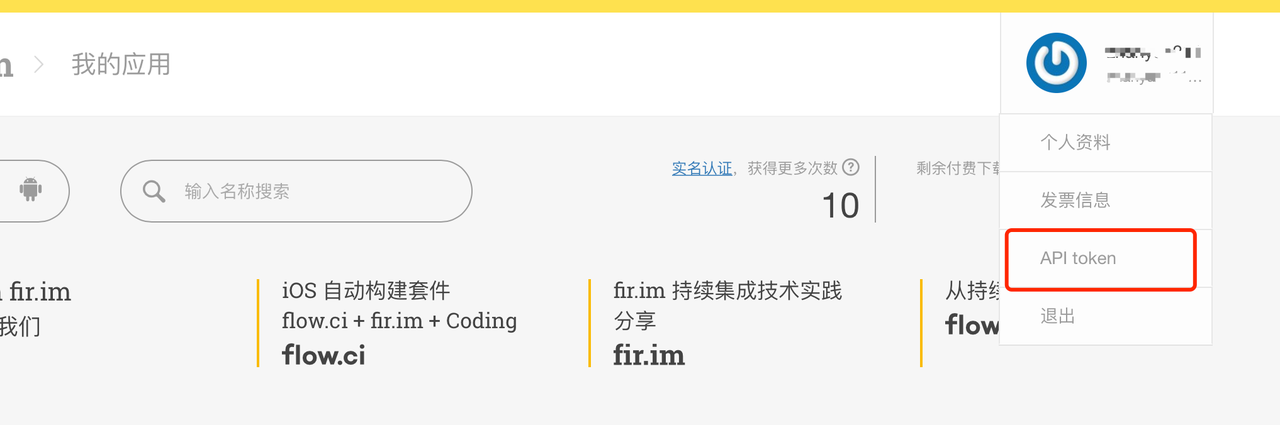
1
2
| echo "正在上传蒲公英..."
curl -F "file=@$ipaPath/$displayName/$displayName.ipa" -F "uKey=$USERKEY" -F "_api_key=$APIKEY" http://www.pgyer.com/apiv1/app/upload
|
方法不累述 USERKEY和APIKEY,上面默认的脚本不上传fir和pgyer,你可以根据自己需求,打开注释,和修改是否需要上传蒲公英的状态开关。
